// Contents
Affiliate disclosure: this guide references PropBuilds first-party DIY kits and EpicDesk affiliate links. We earn a small commission on qualifying EpicDesk purchases at no extra cost to you.
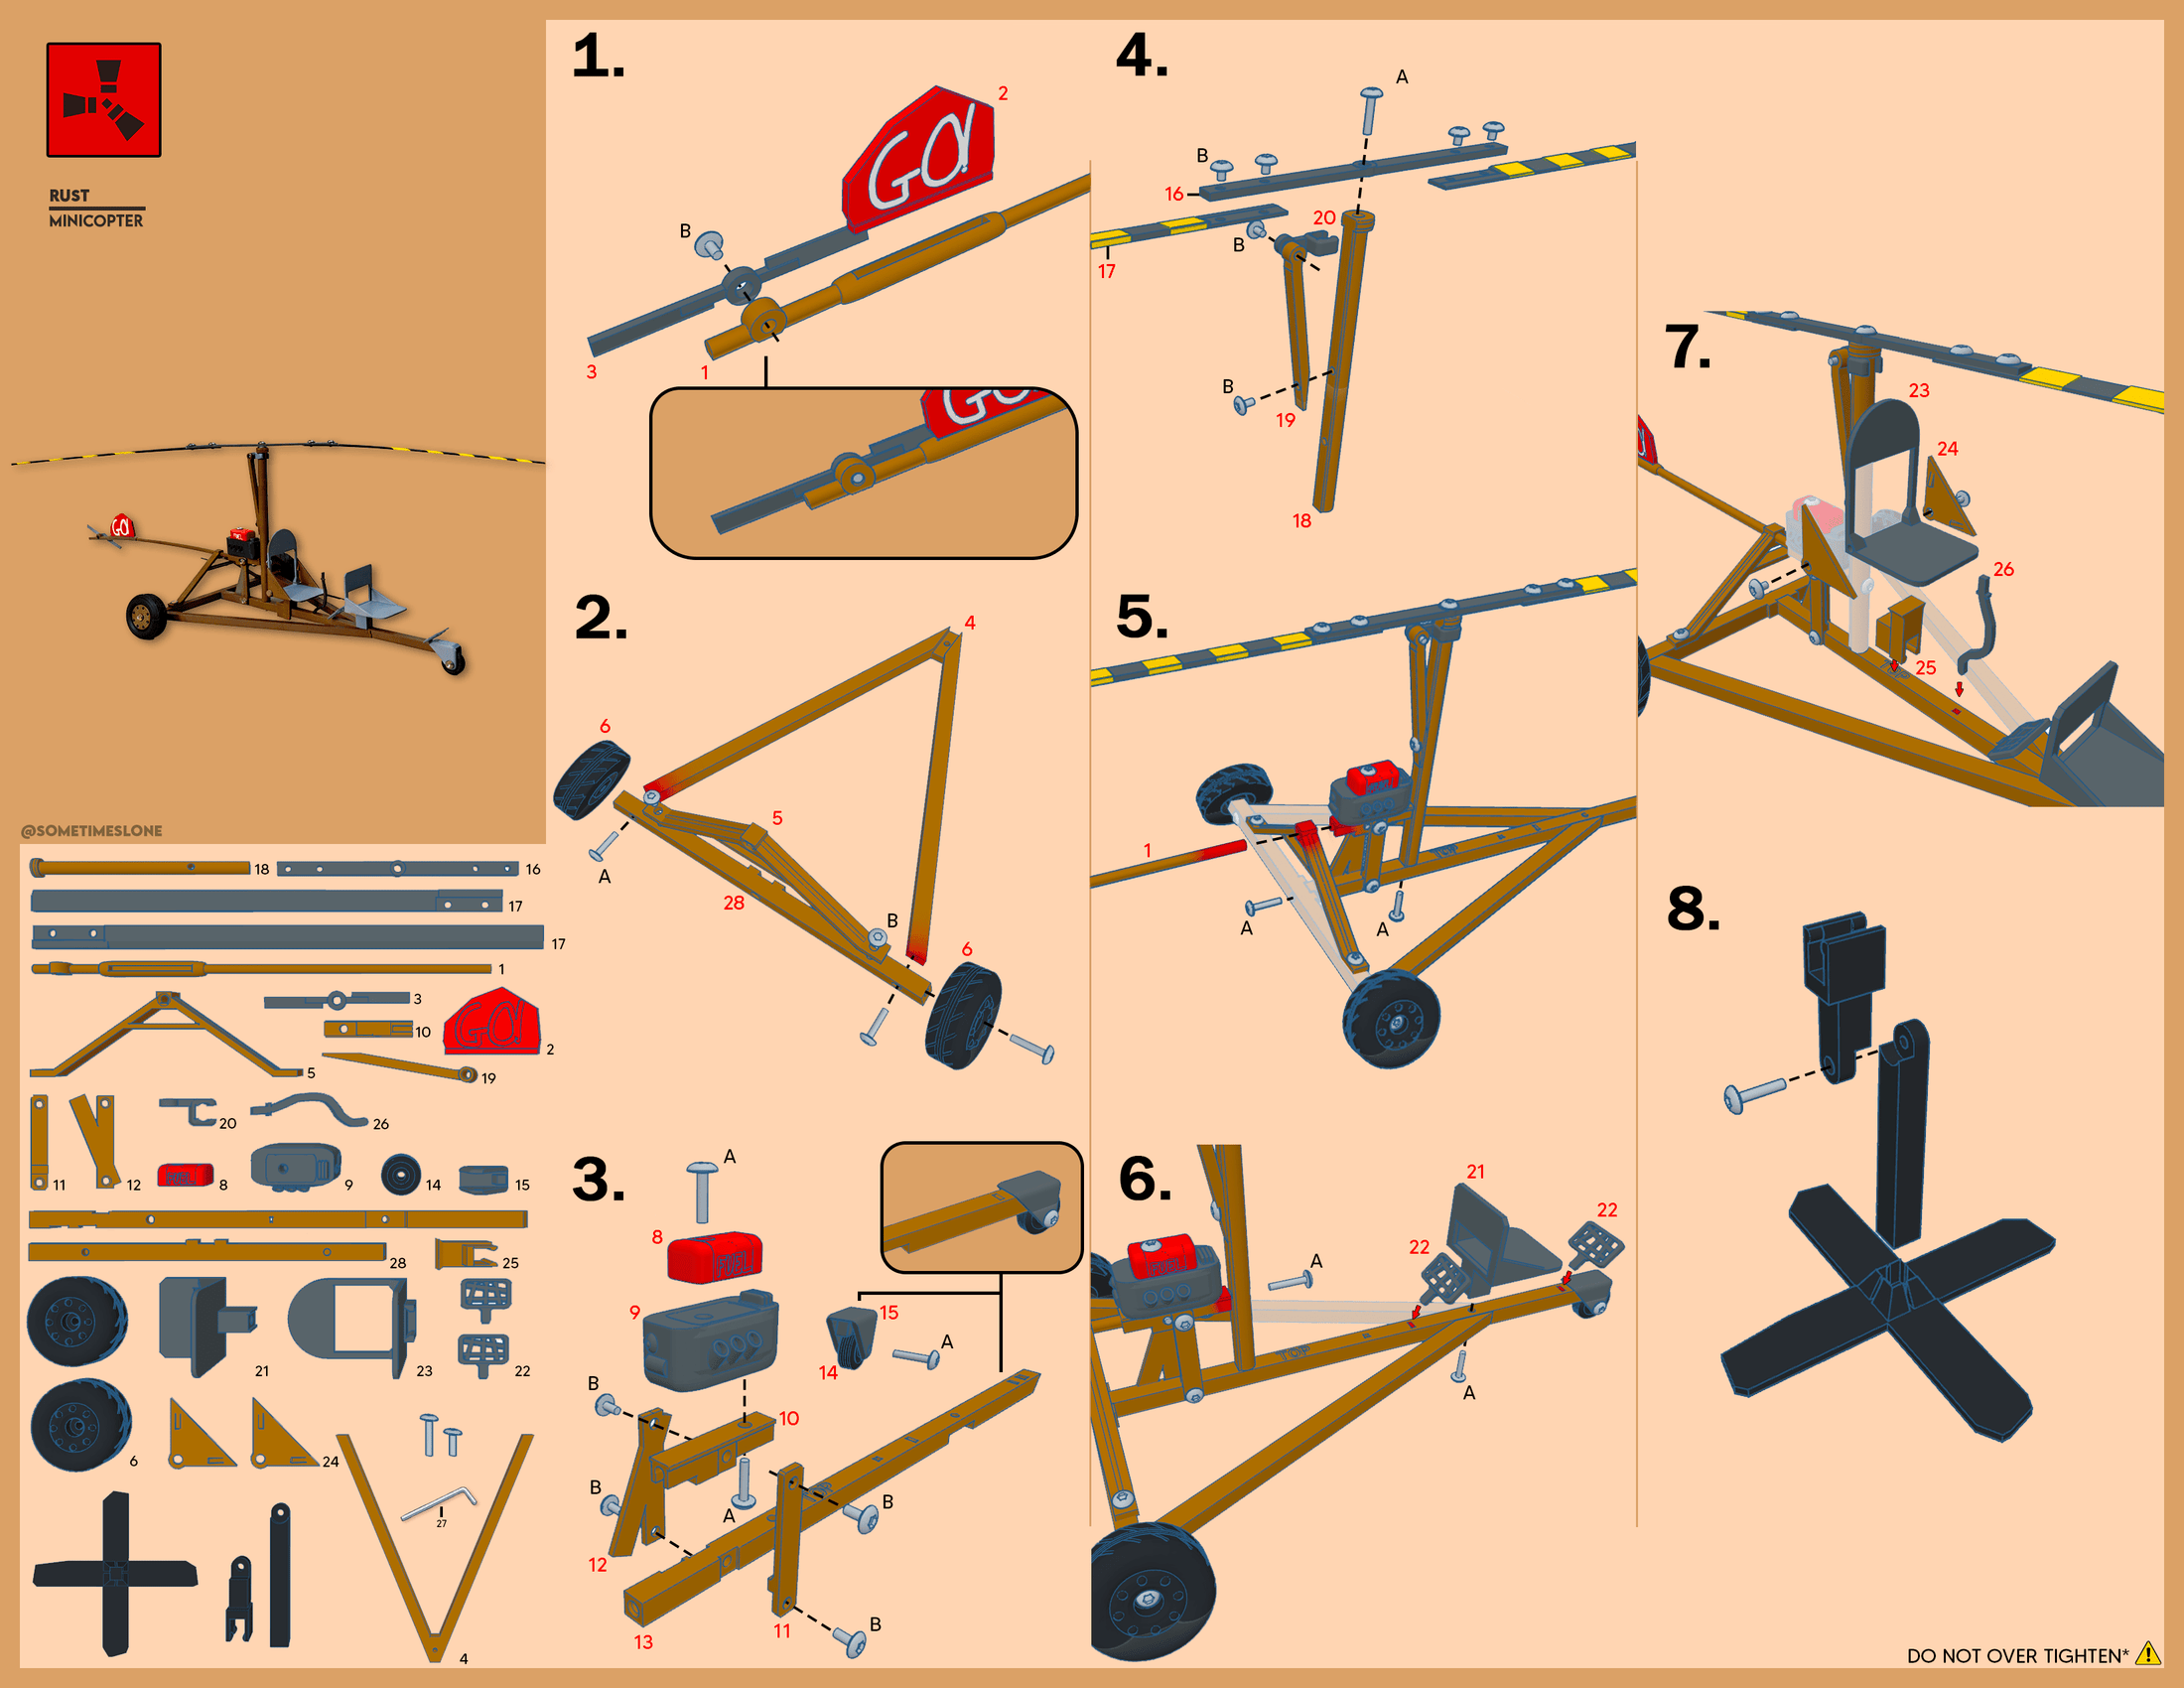
The Rust Minicopter is one of the most-built display props in the PropBuilds catalog. Here's the full step-by-step assembly walkthrough so you can finish in one sitting, rotor spinning cleanly.

What You're Building
The Rust Minicopter DIY Build Kit is 38 numbered 3D-printed parts in premium matte PLA. You assemble it yourself with the included Allen key and the M4 screws in the bag. No glue, no paint, no 3D printer required.
- Build time: ~25 minutes for most first-time builders, 20 once you've done it before
- Tools needed: The included Allen key. That's it.
- Fasteners: 29 M4 screws plus extras, sorted by length
- What spins: Main rotor, tail propeller, landing-skid wheels - all free-rotating under finger pressure
Step 1: Unbox and Inventory
Lay everything out on a flat workspace before you start. Inside the box:
- 38 numbered PLA parts, bagged by assembly stage
- 29 M4 screws plus extras, sorted by length
- Allen key sized for the M4 screws
- Printed instructions with a QR code linking to the build video
- PropBuilds keycard
- Optional adjustable display stand (if selected at checkout)
Check the inventory against the parts list on page 1 of the instructions. Every kit is QA'd before it ships, but if something is missing or damaged, email contact@propbuilds.com with a photo and your order number.
Step 2: Assemble the Main Frame
Open the first numbered bag and work through the frame pieces in order. The frame parts seat together with M4 screws driven by the Allen key. Tighten each screw until it's snug, not until you feel resistance fighting back - PLA is forgiving but it will strip if you over-torque.
If a piece doesn't seat flush, back the screw out, re-align, and try again. The geometry is print-to-order tight, so a slightly off angle will feel like a stuck part when it's actually a 2-degree misalignment.

Step 3: Build the Rotor Hub
This is the slowest part of the build and the part I'm proudest of. The rotor hub uses an M4 axle screw threaded through three captive pieces: rotor hub, printed sleeve, and frame mount.
- Slide the printed sleeve into the frame mount.
- Set the rotor hub on top of the sleeve, axle holes aligned.
- Thread the M4 axle screw down through all three pieces.
- Tighten with the Allen key until the screw head is flush with the hub. Do not over-tighten.
Flick the rotor with a finger. It should spin freely and keep spinning for several seconds. If it locks up, the screw is too tight - back it off a quarter turn at a time until the rotor moves cleanly.
Step 4: Attach the Main Blades
The blades snap into the rotor hub slots. Press each blade in until it clicks. They are oriented - the leading edge sits forward, the trailing edge back. The instructions show the orientation; if you put one in backward, pop it out and flip it.
Step 5: Tail Propeller
Same pattern as the main rotor, scaled down. M4 axle screw through a printed sleeve at the tail mount. Tighten until the propeller spins freely. The tail prop is smaller and lighter than the main rotor so it spins faster under a flick.
Step 6: Landing Skids and Wheels
The skids screw onto the underside of the frame with short M4 screws. The wheels use the same axle-screw-through-sleeve pattern as the rotors, so they roll freely on a flat surface.
Set the Minicopter down on the workspace once the skids are on. It should sit level. If it rocks, check that both skids are seated fully and the screws are evenly tightened.
Step 7: Final QA
Before putting it on display, run through the checklist:
- Main rotor spins freely without binding
- Tail propeller spins freely
- Both skid wheels roll
- Frame is flush at every joint, no gaps
- Sits level on a flat surface
- No leftover screws or parts in the bag (other than the labeled extras)
If anything is off, back out the relevant screws and re-seat. No glue means nothing is permanent. The kit can be disassembled and rebuilt as many times as you want.
Where to Put It
- Desk shelf next to your monitor. Pairs naturally with a Rust-themed desk mat - EpicDesk's Rust collection has several that match the kit's color palette (code PROPBUILDS at checkout for 10% off).
- Floating shelf with accent lighting. The matte PLA picks up warm-tone light without going glossy.
- In a glass case with the rest of your Rust display. Pair with the Shotgun Trap and Hackable Crate for a full Facepunch-themed shelf.
Care and Maintenance
- Dust with a soft brush every couple of weeks.
- Keep it out of direct sunlight for long stretches - PLA can soften and warp in UV over time.
- If the rotor starts to feel sticky, back the axle screw out, wipe the sleeve with a Q-tip and rubbing alcohol, and re-tighten.
Common Questions
Can I paint it?
Yes. The matte PLA takes acrylic paint well. Several builders have done weathered Rust-skin paint jobs - hit the PropBuilds Discord for examples.
What if I lose a part?
Email contact@propbuilds.com with your order number. I keep spare parts stock for every kit.
Do the rotors spin under power?
They free-spin under finger pressure but aren't motorized. This is a display kit, not an RC toy.
How does it compare to the other kits?
The Minicopter is the longest build in the catalog at ~25 minutes. The Hackable Crate is the fastest at ~10. For the full breakdown, read press-fit or screws.
Get the Kit
Order the Rust Minicopter DIY Build Kit ->
Print-to-order, shipped from the home workshop in small batches, with orders typically processed within 1 to 5 business days.
Fan-made decorative build kit. Not affiliated with or endorsed by Facepunch Studios. Rust and all related game assets are the property of Facepunch Studios.